How to complete device preconfiguration
Go to the Dashboard.
-
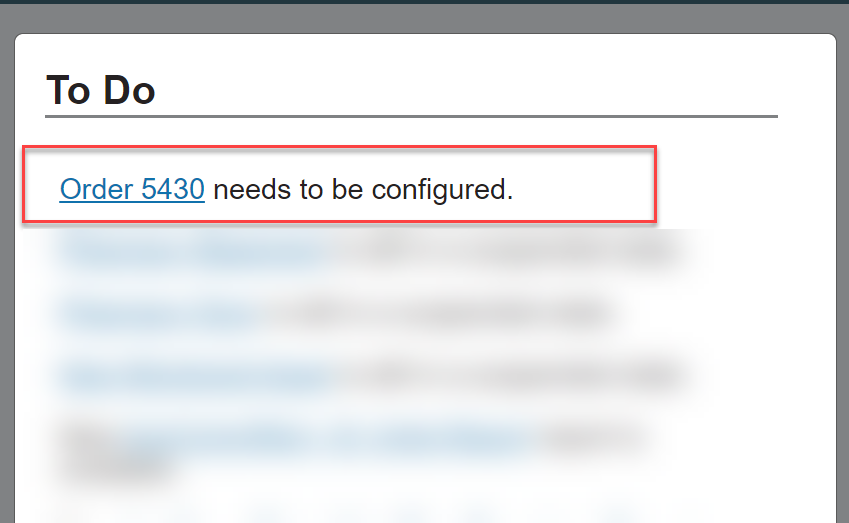
From the To Do list, select the order to be configured.
Note
If you should close your web browser or log out during this procedure, all information provided is saved and you can return to the procedure from your To Do list.
-
From Begin Device Preconfiguration, select if you want to complete the configuration on your own now or request assistance from Primex.
-
If you selected I'll try it on my own
You are guided through the configuration process for each Bell Controller.
-
If you selected have a Primex Project Manager contact me
Schedule a Preconfiguration Consult with a Primex representative.
-
-
From the Network Profiles, review the available networks and select from one of the two options.
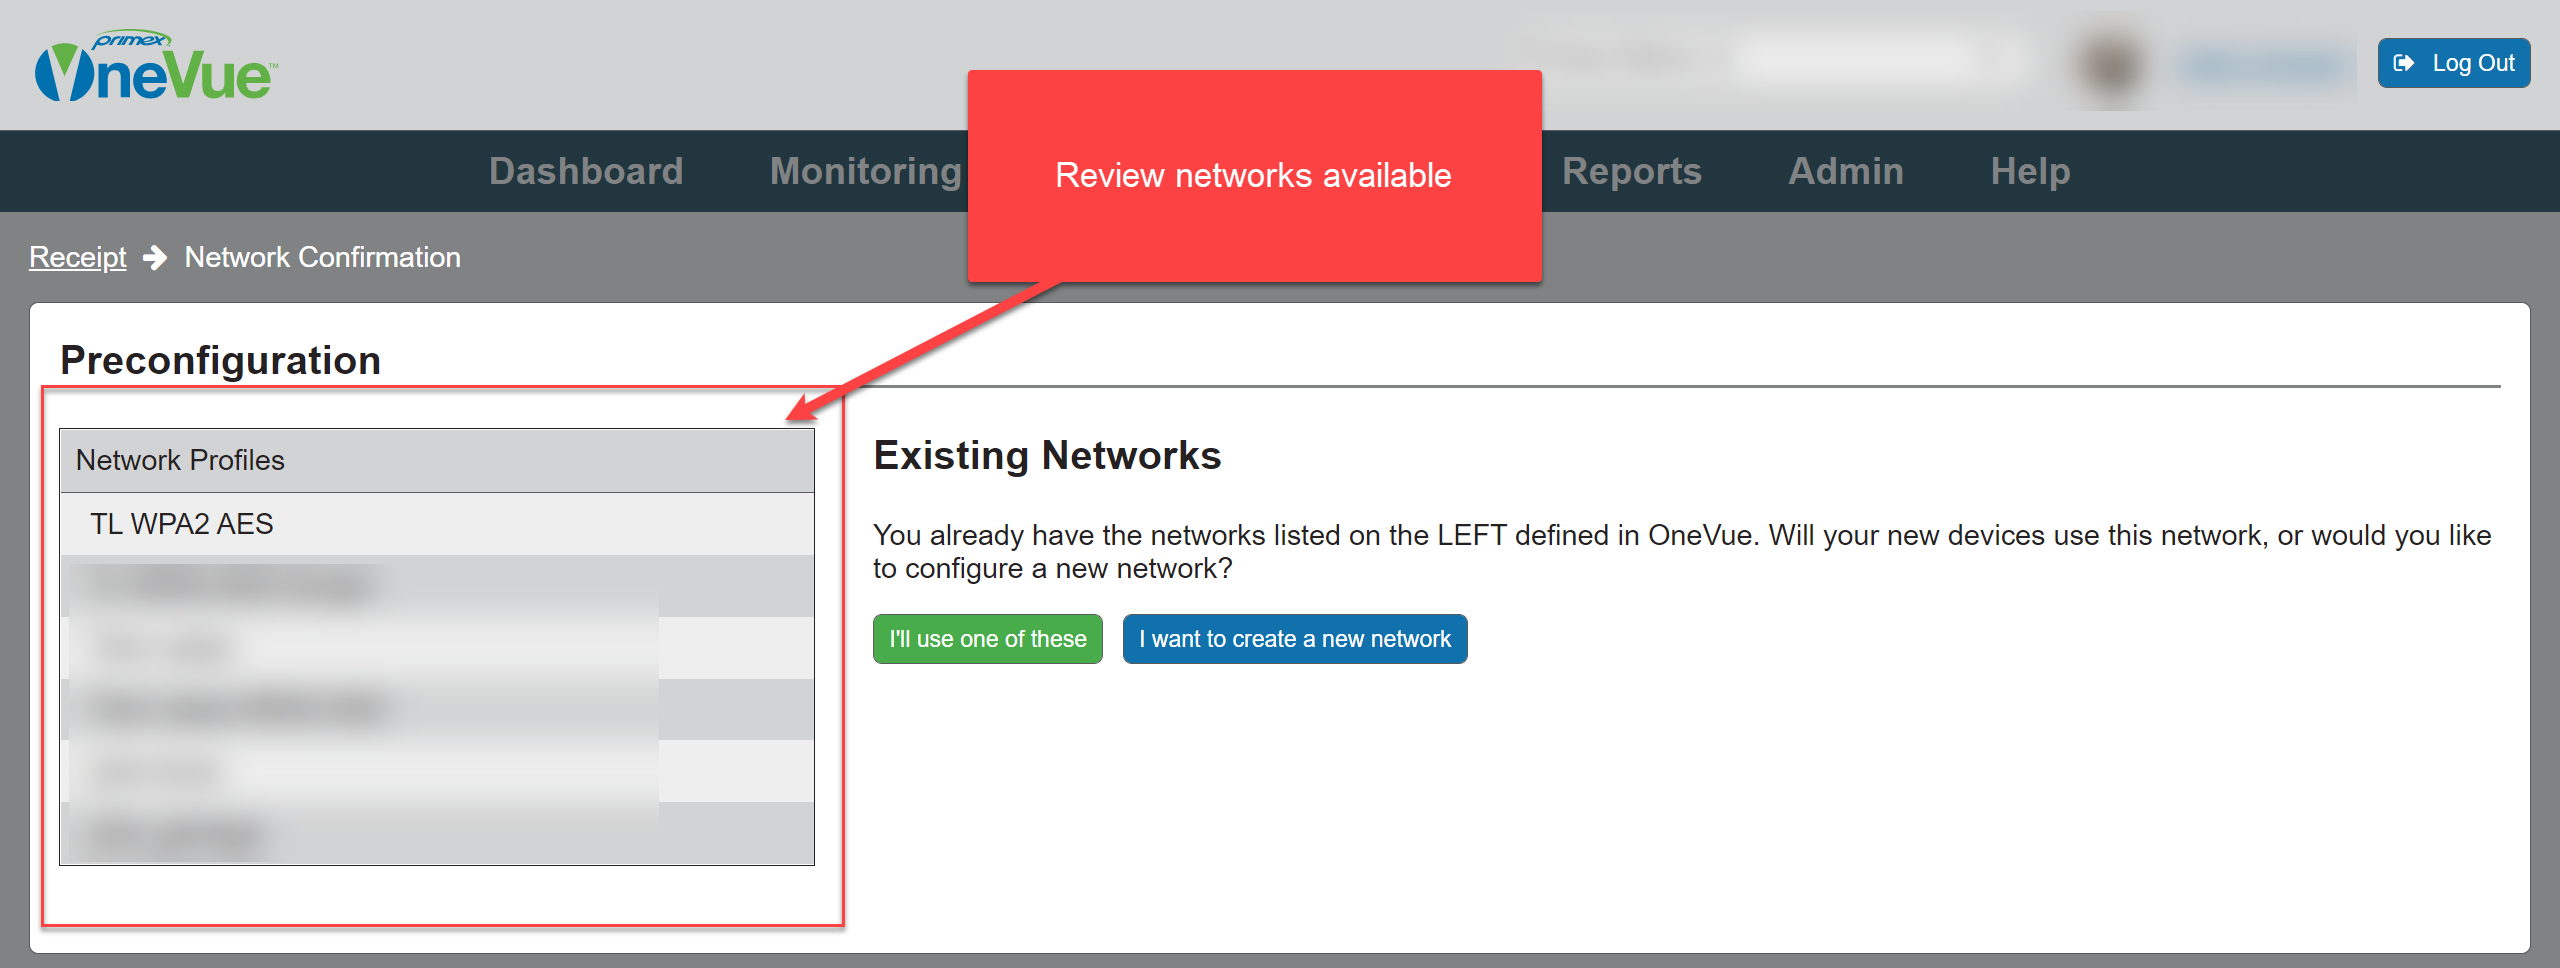
What option to select if...
Bell Controller will connect to a network listed: select I'll use one of these.
Network information is NOT available and you cannot assign a network at this time: select I'll use one of these and when assigning a network to a device select No Network.
-
Bell Controller will connect to a network that is not listed: select I want to create a new network. You are required to provide the settings for the new network.
From the Create Network screen, enter the network settings. To view all settings, select Show Advanced Options.
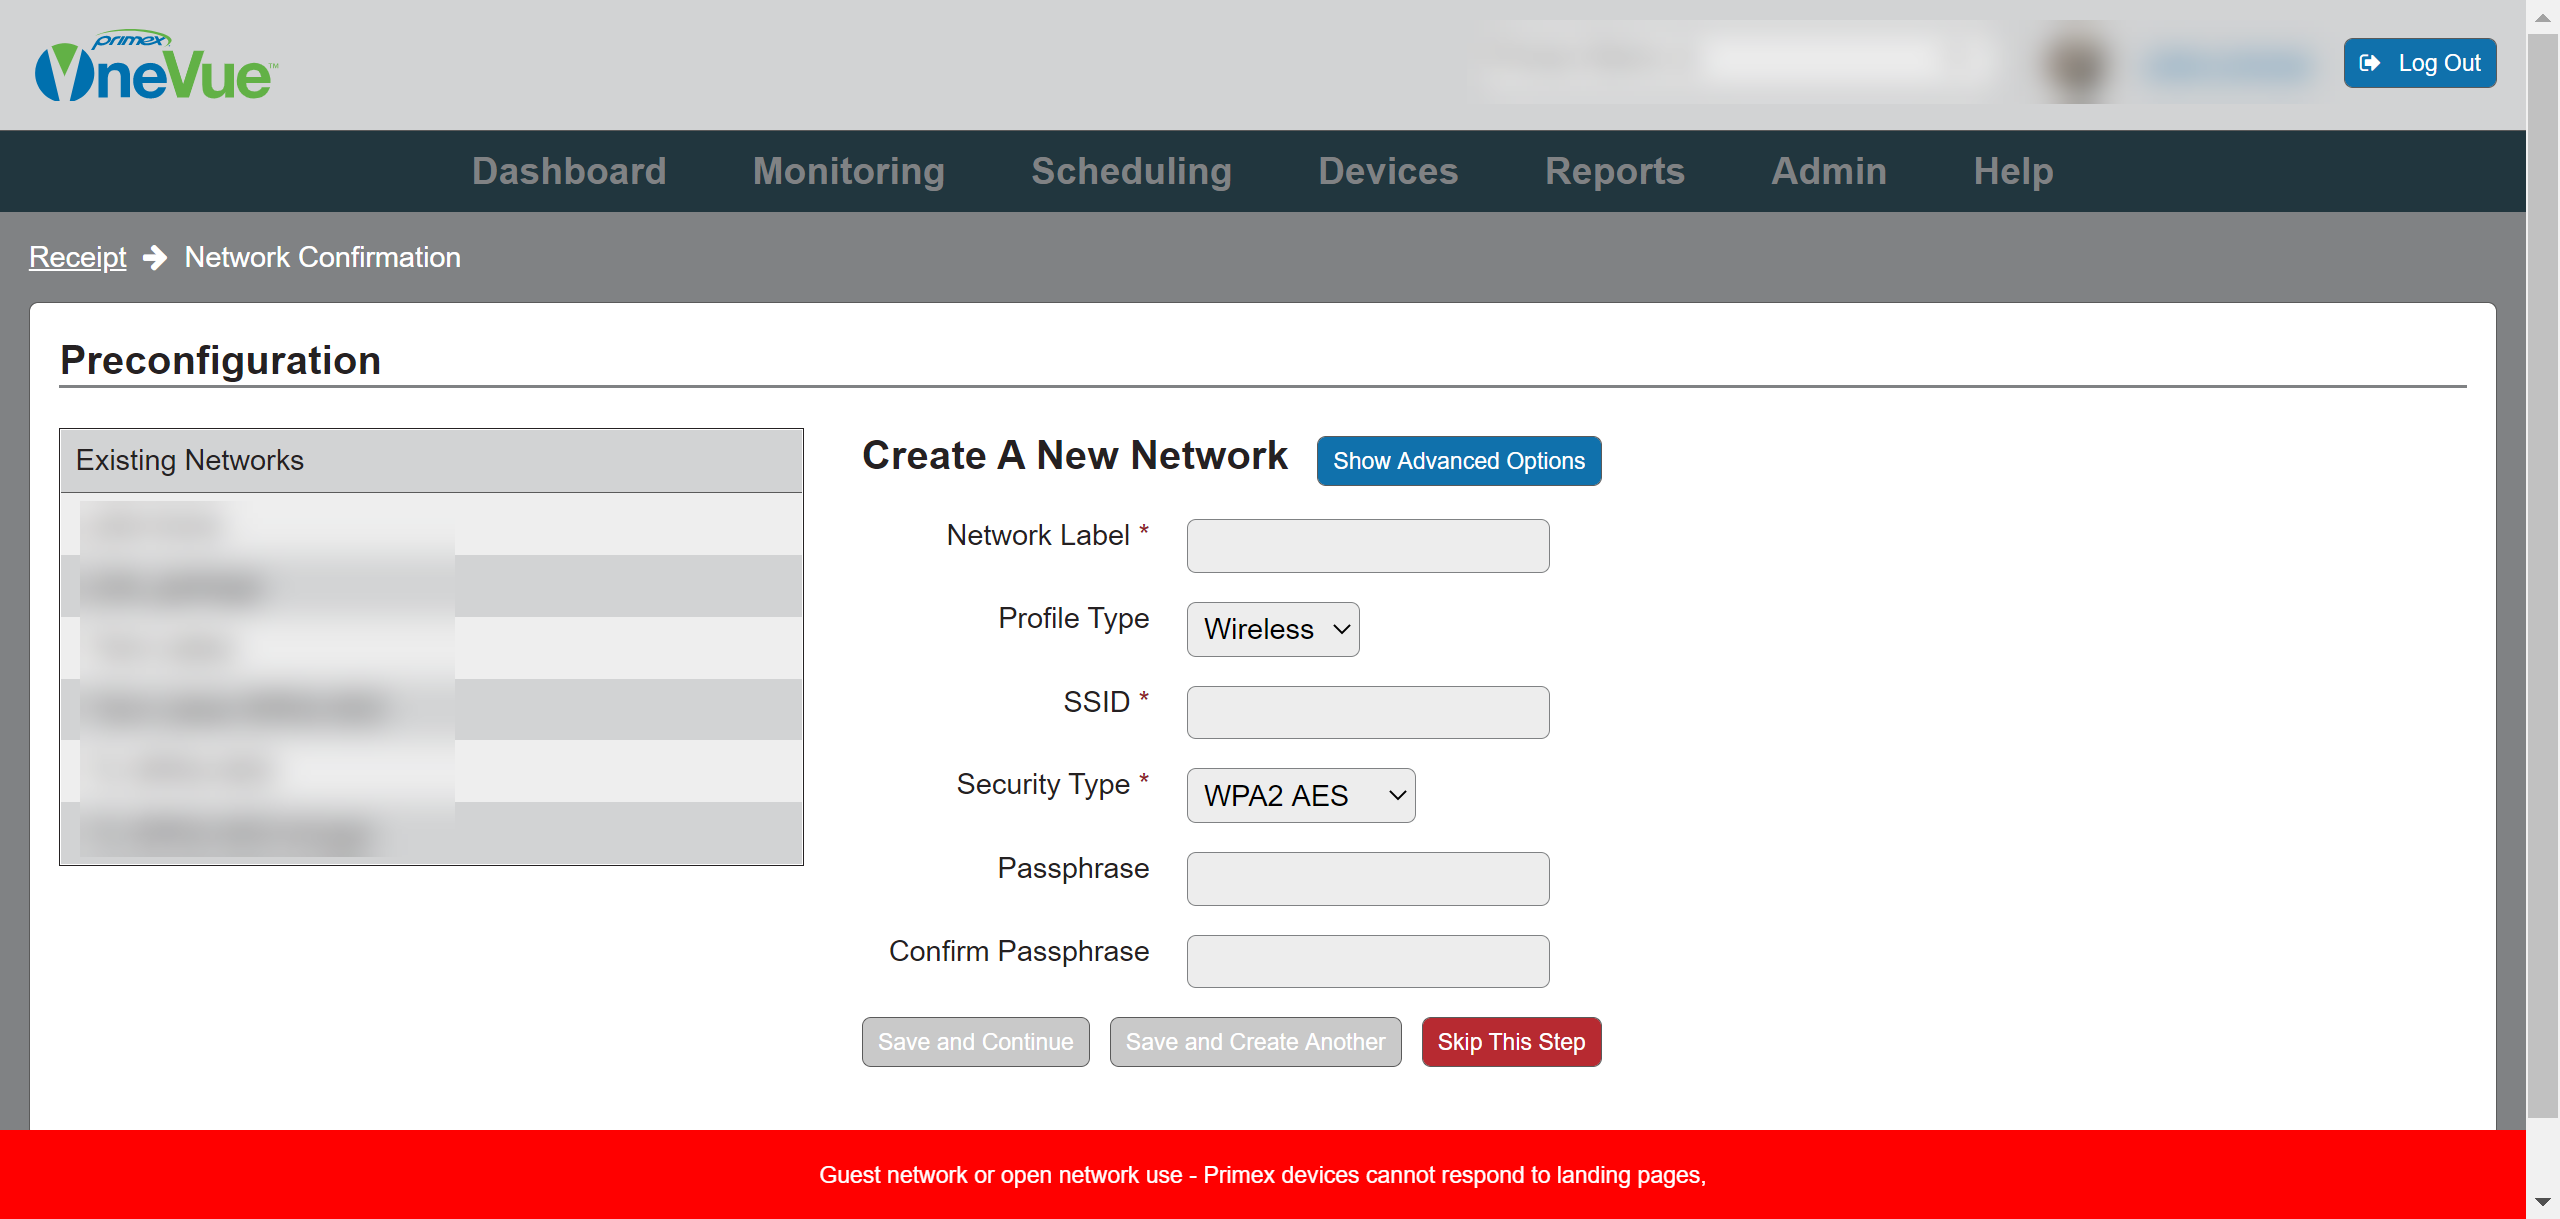
Advanced Options include:
-
Authentication
The type of authentication protocol of the Wireless network. If None is selected, additional settings are not displayed.
-
TCP/IP
The type of network communication protocol of the network; either DHCP or a non-DHCP IPv4 protocol.
DHCP (Dynamic Host Configuration Protocol): select option if the network is DHCP; network allocates dynamic IP addresses to devices in the network.
IPv4 Address protocol: deselect Use DHCP option and enter the settings. Primex devices support Internet Protocol version 4 (IPv4).
-
-
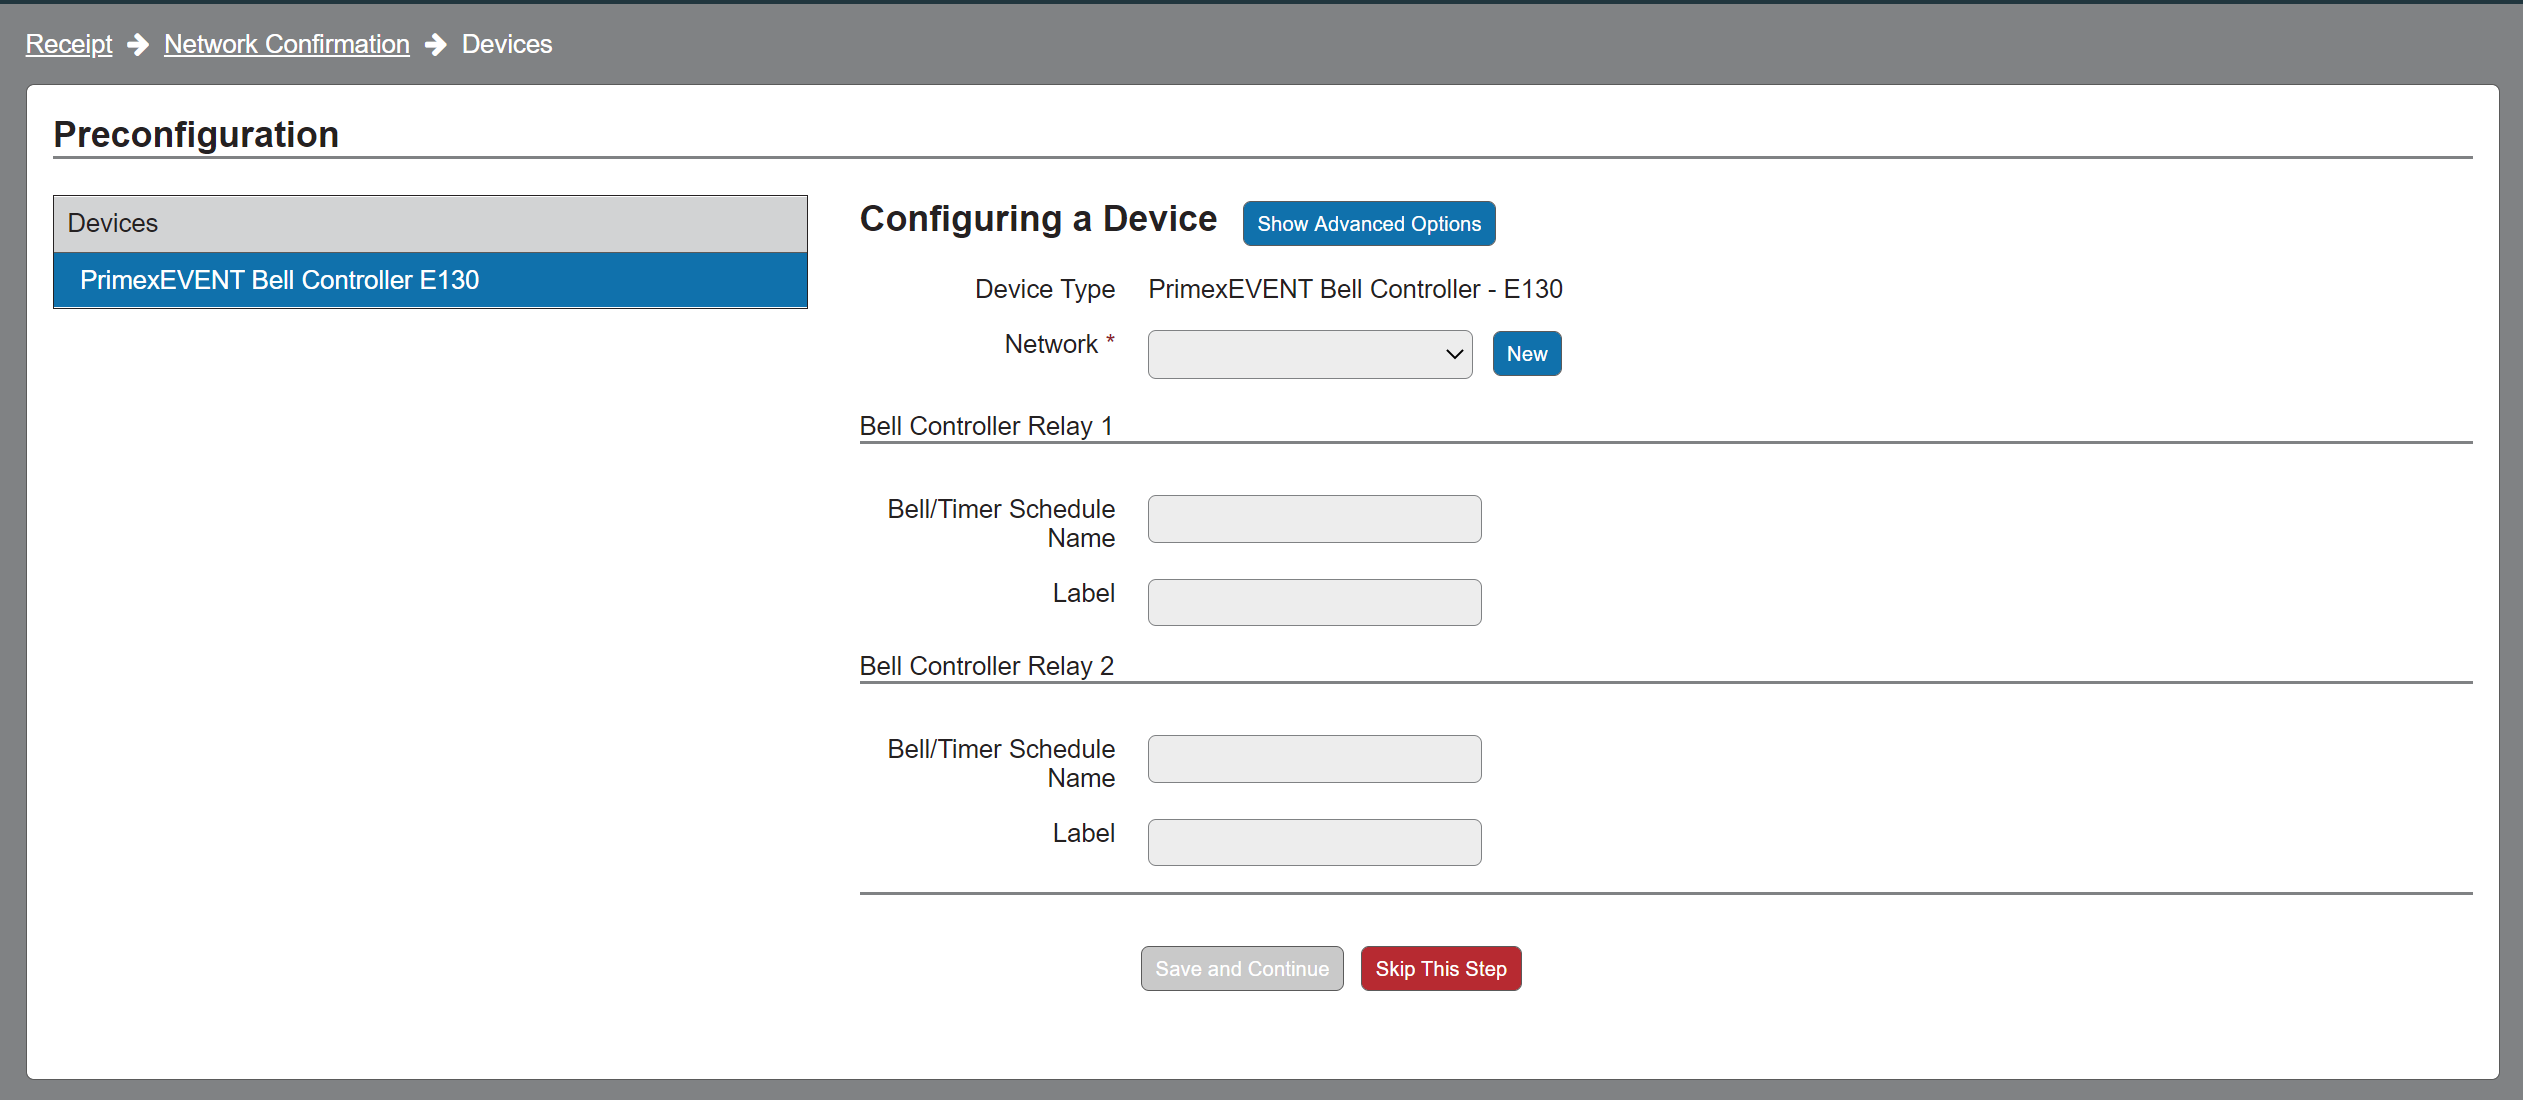
From the Preconfiguration screen, assign a network and enter the settings for each Bell Controller.
From the left section, the current Bell Controller configuring is highlighted. If you have more than one Bell Controller, you will be guided through configuring each device.
-
Network
Assign a network to the Bell Controller, which allows the device to connect to your facility's network.
Select from one of the below options.
Assign an existing network: from the drop-down menu, select a network. If a Non-DHCP network, select Show Advanced Options to enter its static IPv4 address.
If a network cannot be assigned: from the drop-down menu, select No Network. The device is required to be manually configured when it arrives at your facility.
Create a new network: select New and enter the network's setting. To view all settings, select Show Advanced Options,
-
Bell Controller Relay 1 and 2
A Bell Controller has two relays that are wired to your facility's existing PA or school bell system to activate school bells. Each relay is required to be assigned to a bell schedule.
For example, if you have High School and Elementary School with unique bell schedules, set the Bell/Timer Schedule for Relay 1 to High School and Relay 2 to Elementary School. When the Bell Controller arrives at your facility, the installer will wire the appropriate relay to activate the bells in each school.
-
Bell/Timer Schedule Name: the bell schedule assigned to the relay. The name should identify the schedule's school location.
You have two options: (1) create a new schedule or (2) enter the name of an existing bell schedule; it must be entered exactly as it appears in OneVue.
If you entered a new schedule, the bell schedule is added to OneVue and assigned to the relay.
If you entered the name of an existing bell schedule, the schedule is assigned to the relay.
If a name is not entered, a bell schedule will need to be assigned after preconfiguration is completed.
Label: information printed on the label affixed to the bell controller. By default, set to the first 20 characters of the Bell/Timer Schedule. Allows up to a maximum of 20 characters.
-
Caution
Skip This Step: If selected when first configuring a device, the provided settings will be not be saved. This option is commonly used when you need to change a device's settings from the summary page, which allows you to skip devices until you reach the device that requires a setting change.
-
-
Once you have completed the steps for each device, the summary page is displayed. If you need to update a setting, select Change.

Once you are ready to process the order, select Confirm Shipment.
The order's devices are configured by Primex.
Your OneVue account ID and the provided settings are configured into each device. Each device is assigned to the account Business Unit.
Devices and their packaging are labeled with the settings provided during preconfiguration.
Devices are added to your OneVue account. The devices are only listed in your account and are not active. A device does not become active until it connects to your facility's network and checks-in to OneVue.