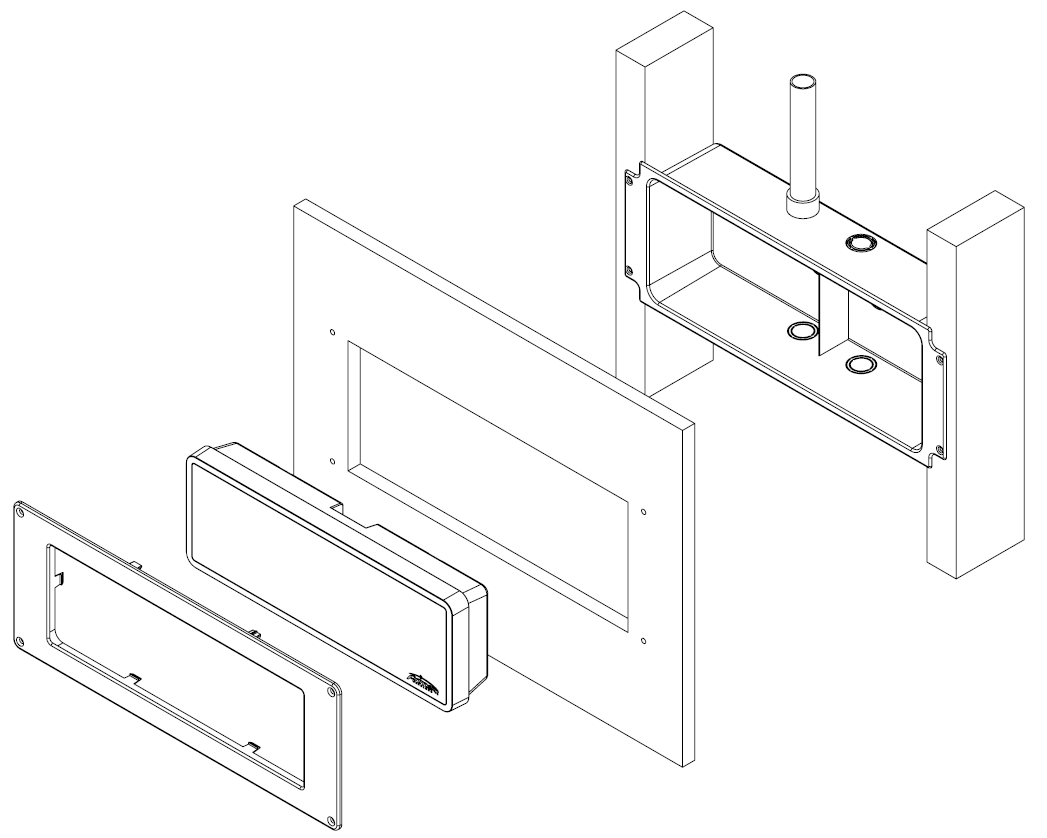
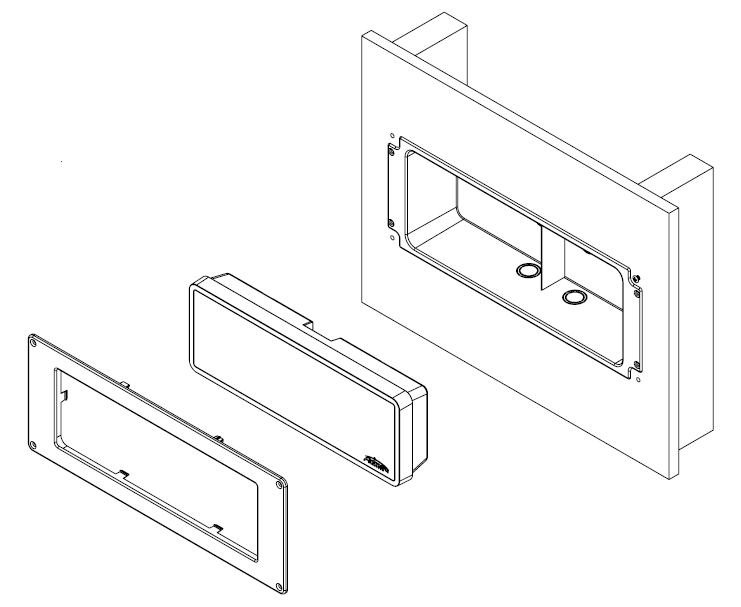
A flush mount model can be installed onto a new or existing wall surface.
Quantity |
Component |
|---|---|
1 |
Flush mount junction box Material: ABS plastic, color black, and UL Rated 94-V0 |
1 |
Bezel Material: ABS plastic, color black, and UL Rated 94-V0) |
4 |
#10 Phillips Flat Head Screw |
4 |
Drywall Anchor |
-
Mount the junction box.
-
New wall surface
Mount junction box to wall studs using four common drywall screws (not supplied), as shown in Figure 1, “New wall surface assembly illustration”.
Remove the applicable conduit knockout(s) for the incoming AC power (PoE optional: for AC backup power use only) and the timer input for a timer model only. Do not remove knockouts that you will not be using.
-
Existing wall surface
Cut a 14.4 in. (36.5 cm) wide x 5.8 in. (14.7 cm) high wall opening between two wall studs, as shown Figure 2, “Existing wall surface assembly illustration”. Securely mount junction box to all studs using four common drywall screws (not supplied) at each of the corner locations.
Remove the applicable conduit knockout(s). Including the incoming AC power conduit (PoE optional: for AC backup power use only) and timer input conduit (required for timer models only). Do not remove knockouts that you will not be using.
Note
For timer models only: AC wiring is required to be located to the right side of the junction box divider and the time input to the left side.
-
Connect the conduit connection(s) to the junction box.
New wall surface only: Cut out a 14 in. (35.5 cm) wide x 5.25 in. (13.3 cm) high wall opening for placement of the clock assembly. Trim opening if necessary.
Gently snap the flush mount bezel onto the front of the clock/timer.
Connect the Ethernet cable to the digital clock/timer and a PoE/Ethernet port.
AC-powered device(PoE optional backup AC power use only): connect and apply AC power.
-
Secure all wiring.
For timer models, secure and complete timer input connections.
Insert the clock assembly into the wall opening.
Level the clock assembly within wall opening and secure bezel to the wall surface using the four screws and anchors (supplied) at each of the corner locations.