XR Transmitters can be configured to use NTP as a time source.
NTP time source requirements
Transmitter is required to be connected to a wired Ethernet network.
Transmitter switch settings must be set for NTP time, which is specific to the Transmitter's firmware version. The firmware version is displayed on the Transmitter front LCD display in the lower-left corner. For version 1.79, set switch 1 to the UP position and switch 2 to the DOWN position. For versions below 1.79, set switch 1 and 2 to the UP position.
Optionally can be configured to use an alternate NTP time source if the factory-default NIST time source will not be used.
Transmitter NTP settings are accessed and configured from a web browser, use of Firefox is strongly recommended, on a computer that is on the same Local Area Network (LAN) as the Transmitter. If you need assistance, contact the on-site IT department.
Note
Prior to configuring the NTP time source, the IP address of the NTP server and Transmitter is required to complete this configuration. Before beginning this procedure set your computer to use a static IP address.
Transmitter factory default network settings
Factory-default IP address: 192.168.1.1
Subnet mask: 255.255.255.0
User name and password: blank (not required)
Pre-Configured NTP Time Source: By default when configured for NTP time, the Transmitter is programmed from the factory to obtain the NTP time from the National Institute of Standards and Technology. According to the NIST they provide a public service by outputting one of two official time sources by the United States. Readings from the clocks of the NIST contribute to world time, called Coordinated Universal Time (UTC). The time maintained by NIST should never differ by more than 0.000 0001 seconds from UTC. For more information, please visit: http://www.nist.gov
Note
Be sure to write down and file all changes made to the network configuration settings. Once the default Transmitter static IP address is changed, the factory default IP address will no longer work and you must use the new IP address to access the Transmitter configuration.
Configure a Transmitter to use a NTP time source
-
Located on the back of the Transmitter, set the dip switch settings to the firmware version.
Transmitter switch settings must be set for NTP time, which is specific to the Transmitter's firmware version. The firmware version is displayed on the Transmitter front LCD display in the lower-left corner. For version 1.79, set switch 1 to the UP position and switch 2 to the DOWN position. For versions below 1.79, set switch 1 and 2 to the UP position.
Insert one end of an Ethernet cable into the Ethernet port located on the back of the Transmitter and the other end into a port on the facility's Ethernet network.
Apply power to the Transmitter.
-
From your computer open a web browser, recommend use of Firefox is strongly recommended, and from the address bar enter the Transmitter factory default IP address: http://192.168.1.1
If the Transmitter IP address has been changed from the factory default address, complete steps in section below Set Transmitter temporary IP address during NTP configuration. Once complete, proceed with following step.
Note
Your computer is required to be on the same subnet as the Transmitter (for example: 192.168.1.10).
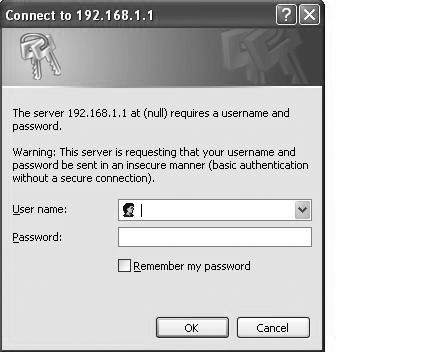
The Connect To dialog window is displayed. Leave both user name and password blank, click OK to log into the Transmitter.

-
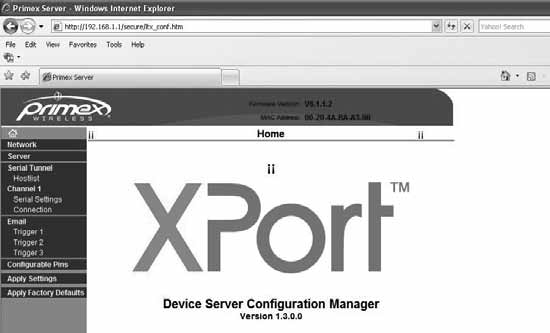
The XPort Device Configuration Manager screen is displayed.
-
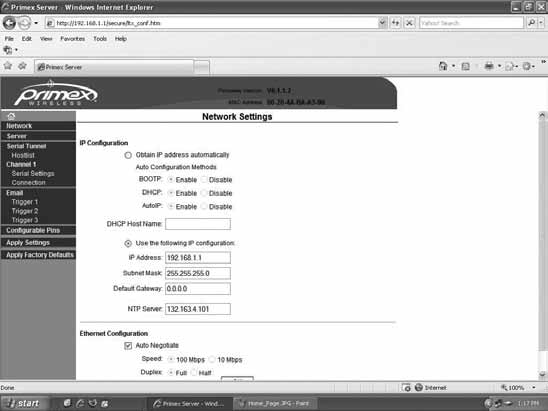
Click Network. The Network Settings screen is displayed.
-
To change the factory default static IP address, set the options in the Network Settings screen.
To use DHCP, select “Obtain IP address automatically”. You must also enter the DHCP Host Name.
To use a static IP address, select “Use the following IP configuration” and enter the IP Address, Subnet Mask and Default Gateway.
Be sure to write down and file the changes you make to the network configuration settings. Once the default static IP address is changed, the factory-default IP address will no longer work and you must use the new settings to access the Transmitter configuration.
(Optional) Enter the IP address of the NTP server to set the Transmitter's time source.
Click OK.
-
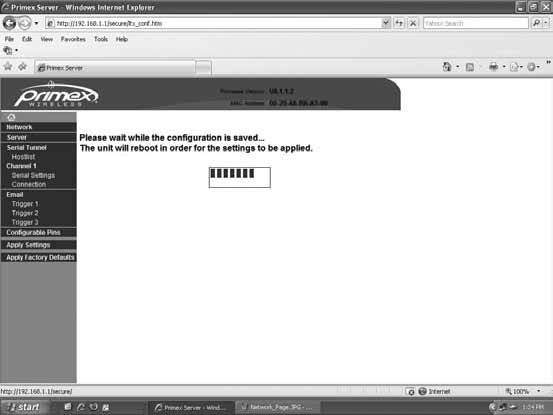
Click Apply Settings on the configuration frame.
The Transmitter automatically reboots (restarts). The window below is displayed.
Set Transmitter temporary IP address during NTP configuration
When configuring a Transmitter for NTP time and the IP address of the Transmitter is not known, you can assign a temporary IP address. Using the temporary IP address you can then access the Transmitter’s network settings configuration screen to set the NTP time source. You may need to perform this procedure if you have forgotten the Transmitter’s IP address or if the Transmitter is set to use DHCP.
Note
The assigned temporary IP address used during this procedure is only accessible as long as the Transmitter is powered. If power is lost before the IP address is configured, you will need to repeat this procedure.
On your laptop disable its wireless network connection. This ensures the laptop does not compete with any wireless networks in range when obtaining or assigning the temporary IP address.
Change the IP address of your laptop to a static IP address that is on the same subnet as the Transmitter. For example, if the Transmitter IP address will be 192.168.0.6, you can set the laptop’s IP address to 192.168.0.2 with a subnet of 255.255.255.0.
Connect an Ethernet cable directly from your laptop’s Ethernet port to the Transmitter’s LAN port.
From your laptop, open a command window to set the temporary IP address for the Transmitter. To open the command window, select Start > Run. > from the run dialog, type cmd > click OK.
-
From the command window, enter the command below to assign a temporary IP address to the Transmitter.
arp –s xxx.xxx.xxx.xxx xx-xx-xx-xx-xx-xx
replacing xxx.xxx.xxx.xxx with the temporary IP address of the Transmitter and xx-xx-xx-xx-xx-xx with the MAC address of the Transmitter’s LAN port.
For example, if you want to assign the temporary IP address 192.168.0.6 to a Transmitter with LAN port MAC address 00-20-4A-93-7F-D4, you would enter the command below:
arp –s 192.168.0.6 00-20-4A-93-7F-D4
Note
If you do not know the MAC address of the Transmitter’s LAN port, the MAC address is listed in the Transmitter’s Diagnostics menu.
-
To complete assignment of the temporary IP address to the Transmitter, enter the below command into the command window:
telnet xxx.xxx.xxx.xxx 1
replacing xxx.xxx.xxx.xxx with the temporary IP address of the Transmitter.
In our example, you will type:
telnet 192.168.0.6 1
The telnet command will fail, ensuring the web connection will be available.
-
To verify the web connection is available, ping the Transmitter by entering the below command into the command window:
ping xxx.xxx.xxx.xxx
replacing xxx.xxx.xxx.xxx with the temporary IP address of the Transmitter.
If replies are received, you will be able to access the Transmitter through the web interface.